Showing posts with label Crafts. Show all posts

Sunday, August 11, 2013

Weekend Recap

This weekend seemed rather short to me...and that may have to do with coming home from the beach on Sunday and not Monday.  No me gusta!  But a weekend at the beach is never anything but GREAT!

This was Mattie's last weekend in town for a while so Friday night was spent out on the island with friends.  At dinner Mom had to parallel park and well then this happened...


Laurie standing in the middle of the road holding up traffic so we got our parking spot!  Sometimes I think we find the crazies...and love them for it!

Saturday was going to be a good day to blog about.  Dad and Mattie were going to go diving, I was going to take lots of pictures, and tell you all kinds of fun stories.  And then the weatherman person lied.

2 foot seas my butt!!!  We went out thinking it would be mostly smooth.  Well I was riding on the front of the boat out there and Mom thought she lost a child it was so rough.  I only flew out of my seat twice... Needless to say we called off the diving and went to the beach.

Sunday I headed home with the dogs and got my DIY craft on.  I have these six canvases that were up in my dorm that I wanted to recover.  And so I bought some fabric and covered them.  Easy Peasy.  And I plan to buy some cute thumb tacks and hang some pictures on them:)


Hope everyone had a happy happy weekend:)
Signature

Tuesday, July 9, 2013

Apartment Makeover Part 1

If you didn't already know I am SUPER DUPER DUPER excited about moving into my new apartment in just less than 2 months!!!!  Seriously I wish I was moving tomorrow and had everything ready to go.  Unfortunately/fortunately I still have some time.

This weekend I completed my first apartment project.  There will be more makeovers so that would be why this post is title Part 1.  

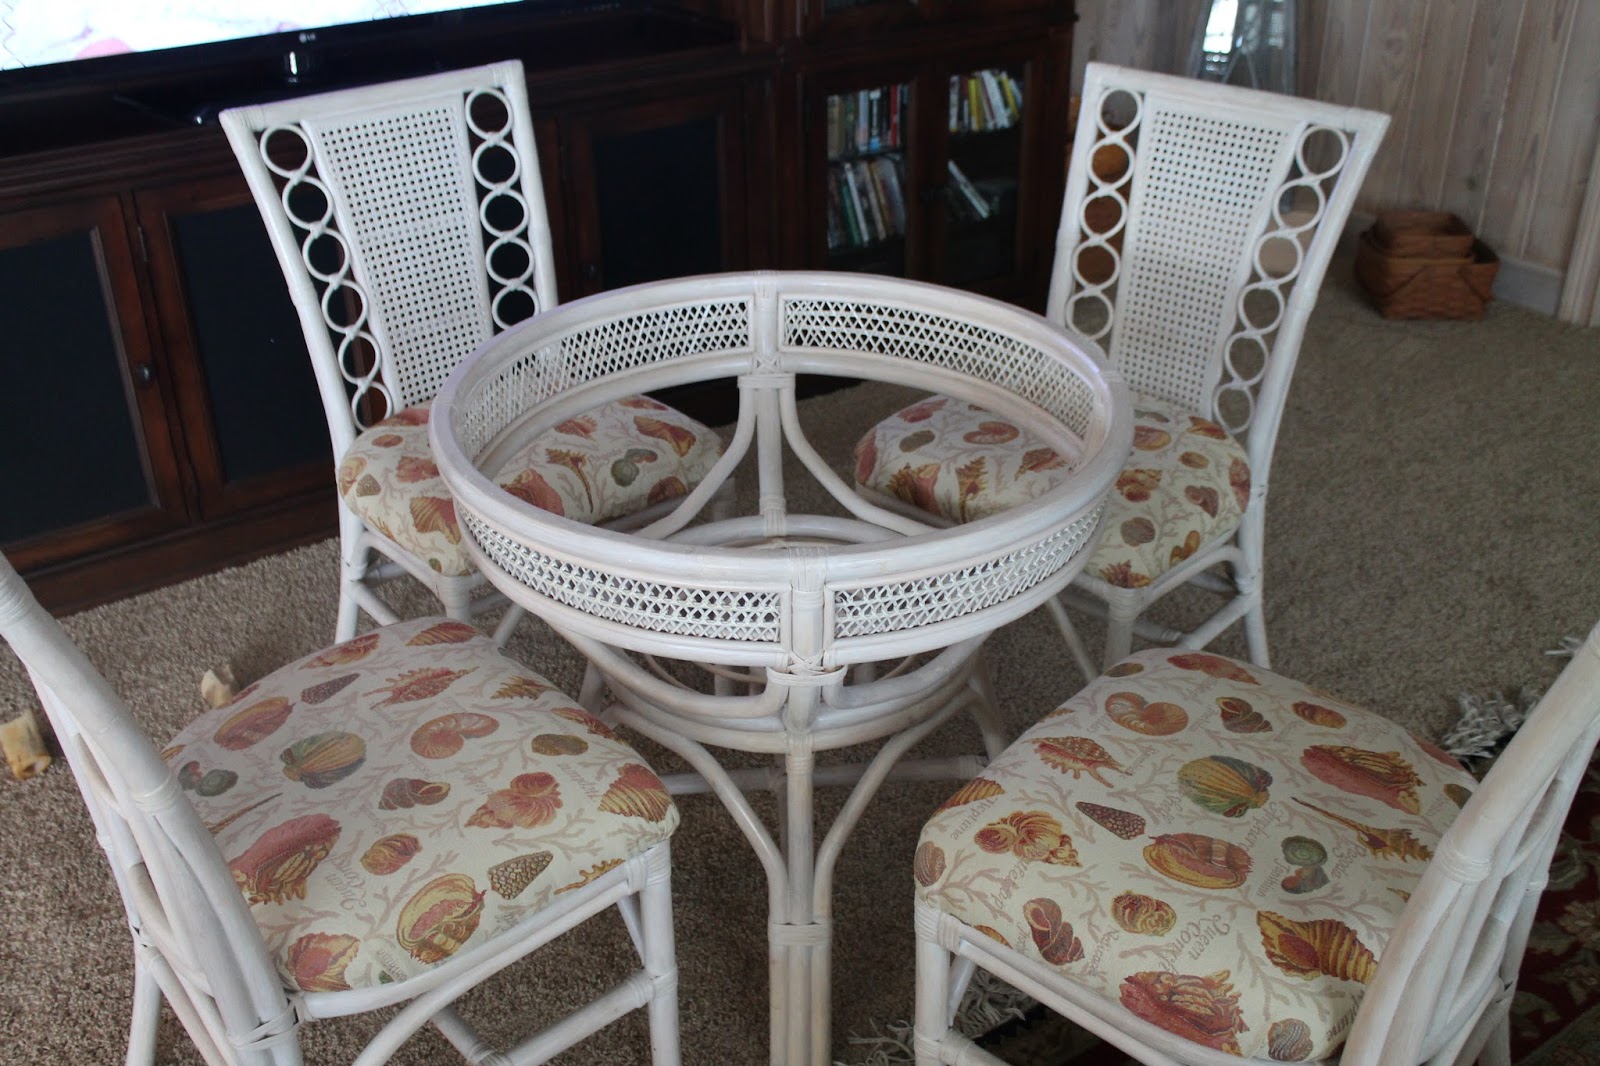
My parents gave me a table and 4 chairs that had been in the upstairs of our beach house that was really only used to hold our stuff and hang towels over.  While I did not love the coloring of it, I fell in LOVE with the basic design of it.  

This meant I had some work to do.  And I was extremely excited to makeover my very first piece of furniture!  So here is what I started with:


Since I do not have any other white furniture going into my apartment, I decided to spray paint the table and chairs a chocolate brown.  And since I do not plan on have a beach theme, I got rid of the sea shell fabric and added fabric that was more my style and color.  And here is what I got:


I honestly could not love it more.  And since the table was free I only spent about $24 on paint and $22 on fabric.  This means for less than $50 I have a brand new (to me) table and chair for my apartment.  Oh and by the way the glass is missing for the table top!

Up next I have a desk to makeover, some couch pillows, and some other fun crafts!  I cannot wait to not only have it all done but all in my apartment as well!
Signature

Sunday, July 7, 2013

The 4th & Weekend Recap

Happy belated 4th of July friends!  I know I am late in posting my festivities, but I was just having too great of a weekend to even think about blogging.  I call those weekends the best kind of weekends.


The Fourth was spent watching a parade that morning and then cornhole by the pool that night.  I wore my Fourth of July bow and Boone got all the beads, that is after he crawled under the golf cart to get some shade.  It was fun to be with family and doing much of nothing.

Unfortunately, Friday morning I had to head back to work.  And that was not exactly what I call fun.  But at least I was able to come home to a bottle of wine, a good movie, and a nice sister.

After looking for a dining room table for my apartment, my lovely mother had the idea for me to take the one that was upstairs at our beach house.  That table was really only ever used for holding things when we came down.  Lucky for me (yes I mean lucky) the table and chairs were not the color I wanted.


I LOVE the design of the table and chairs, just not the color.  I have no other white furniture so it would not fit at all in the new place.  Unfortunately for you, you will have to wait till later to see my finished project...let's just say IT'S PERFECT!

In the midst of refinishing said furniture above, a little creature decided to scurry its way into our house.  You see I opened the front door, saw said little creature, screamed and ran outside with the dog, Mattie screamed and ran inside and therefore the door was left open and he sneaked on in.


Oh did I mention said creature was a SNAKE!!!! Yeah and he was a feisty one at that!  Apparently Hardin's are not snake fans at all.  So I had to go get the next door neighbor (who we later found out is scared of them too) to come get the snake.  He went from my mom's office to under the couch to the back porch to being shoved out the screen door.  45 minutes later we were very happy to see him go!

Saturday night I Face Timed with my best friend! We seriously could not figured why we had not done that before! It was so great to here Lauren's voice and catch up with her.  Hopefully in about a month and a half we will be doing that in person!


The rest of my weekend was spent curled up on the couch watching episode after episode of One Tree Hill.  Just the way I like it:)
Hope you all had a wonderful Fourth and weekend!
Signature

Thursday, December 27, 2012

Crafty Christmas

For the past two Christmas's I have done several crafts for my Mom and sister. I enjoy spending time crafting, and I feel like I can make their gifts more personal! This is not to say I did not also go out and buy some things off their Christmas list for them!

Last week I wrote about the letter H I made out of wine corks for my mom for Christmas last year. This year I knew more wine cork crafts were in order!

For my mom I spelled out the word FAMILY in wooden letters I bought from Hobby Lobby and then hot glued away the wine corks on.


I decided then to do my sisters initials in wine corks as well. I think it will be a nice little accent to her kitchen or living room!

This year I really wanted to do something with wine bottles. My first plan of wrapping them in string was a huge fail. So plan B came up.

I painted the bottles and then stenciled on designs. The colors are perfect for our living room and kitchen area and I loved how they turned out.


My last craft that I did was personalize coffee mugs for Mattie. She told us a while back that she didn't have many coffee mugs. I bought basic ones from Target, used paint pens for dishware, and decorated the way I wanted. They were very simple but I liked the end result!


Hope everyone had a very Merry Christmas!

Monday, December 17, 2012

Gifts of Christmas Past

I have been meaning to write this post for the past year!  But later is better than never...I hope at least!

Last year I made some pretty awesome gifts for my family if I do say so myself.  I worked really hard on them and was beyond excited when it came time to open presents.  

There is one gift that stands out among all of the ones I made.  Let me give you a little back story to it.  My family LOVES wine.  Dad collects it, we have 6 wine coolers in the house, and we all get to enjoy it.  A while ago Mamerz thought that it would be fun and decorative to collect the wine corks.

Well since we had so many I decided something needed to be done with them.  My inspiration came from this on Pinterest.

via
Obviously instead of the letter K, I did the letter H for Hardin.  I ordered a 22 inch tall and 2 inch thick wooden H offline.  I am kicking myself for not remembering where.  But just google it and I know you will find a place!


I collected all the wine corks I could find from the house.  Mamerz knew something was up, but she had no clue what I was doing!


I then hot glued one by one the wine corks onto the H.  There is no method to this, other than varying up the corks so that you don't have all of one color together.  As you can see red wine is the norm around here, but I threw in some white wine corks as well.


You just continue adding corks all the way up the letter.  I just used my best judgement on trying to keep it looking even.  I wish I had done a better job at that, but it was my first try.  I guess you could lay them all out first, but that would take way too long for me!


And here is the finished product! I was IN LOVE with it! And I knew Mamerz was going to be blown away by it.  Christmas morning came, and when her and Dad opened it they were amazed and in love just as much as I was.

It now hangs in our kitchen and looks wonderful!  Needless to say there may be some more wine cork christmas presents coming this year...
Photobucket

Monday, August 13, 2012

A Productive Sunday

Did you know I move back to Milligan this Saturday? Have I ever mentioned that before? Well in case you forgot from the 900 other times I have said it, I am.  But I have a long way to get there.  And that's not including the 11 hour drive I have.

I have quite a bit that I need to get done this week so I can head back to TN on Saturday.  So I decided to make a list of all that I need to do.  Well that list turned into a list of things I needed to buy, and then that list turned into a list of when I was going to do everything.

So maybe I like lists.  Don't hate, appreciate! If I don't write it down it won't happen and then things go crazy and then I go crazy and trust me when I say we don't want that to happen...

So In effort to get started on these lists of mine I FINALLY finished those canvases I have been working on ALL summer.  No joke I started those like way back in May and just finished them.  Yup I am a lazy bum sometimes.

I am so happy with the end result.  All I need to do is add the pictures to them (speaking of I need to go print some more off) and put them on the wall.  

Oh and of course as I was finishing up the last two canvases I came up with a way better and way easier idea for them.  Hate it when that happens! Oh well that just gives me something else to plan on doing in the future.

This middle canvas is covered in scrap book paper.  I totally messed up that canvas trying to do something cute with Mod Podge.  Major fail.  I couldn't paint over it and instead of throwing the canvas away, I just covered it.  I love the contrasting print.

I just love it when I have somewhatly productive days.  It's a good thing I will be having those all week!
Photobucket

Friday, August 3, 2012

Just Call Us Craftistas!

I decided to be a nice and good sister and help out Mattie with decorating her apartment.  As you read this I am probs in the car heading to GA to move her in.
She needed things to put on her walls and that is where I came in.  And of course I think they are fabulous!  Between Mamerz and I, we have this down! Team work is the best work!
The first thing we worked on was something to go above her bed.  I thought about it and came up with an idea to do a three paneled thing with her initials.  To make it easy we went with foam board covered in fabric and then painted on her initials.

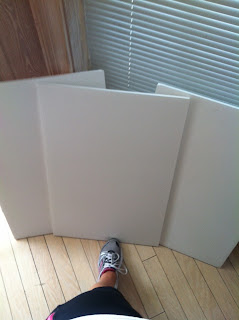
Here are the three foam boards we used.  They were only $5.99 at Hobby Lobby and worked great.


I covered them in the fabric Mattie picked out.  We wanted something that went with her new bed spread but not the same.  I think it works great.


As I worked on covering the boards in fabric Mamerz painted on the letters.  So glad she was able to do this because one painting is not my forte and two I needed some help in order to get this done on time!


Here is the finished product.  I really loved how they turned out! I am also planning on adding some fabric flowers to them and will probs show you that another time.  Probs when I show you them finally hung up on her wall.

The next project was to figure out something to do with her canvases.  I didn't really want to paint them again so I came up with this idea to cover them in scrapbook paper.  I honestly didn't know if it was going to work or not.  In the end I really liked how they turned out.  She is going to put pictures on them and then hang them on the wall!


Well now that I am done being all crafty I am helping Mattie move in! Hope everyone has a great weekend:)
Photobucket

Monday, June 25, 2012

Weekend Recap

This weekend was all rainy and everything so we spent our time in Lakeland, rather than down on Anna Maria.  It was a nice reprieve from the beach.

My Friday got started off right with this text message from Becky! Seriously made my day:)

Yes I realize I can't spell.
On Friday I had to work till about 6:30, and let me tell you if I never have to work a Friday night again I will be perfectly OK with it.  We bleach everything in the place on Friday nights.  It is tedious and takes FOREVR!

After work I met up with Dad and Mamerz and went out to eat where of course I run into my boss.  Oh just a tad bit awkward but oh well what are you going to do?

Saturday morning Mamerz and I woke up and did a Spin class.  Not only was this the first Spin class I have done in forever, but it was the first one since my surgery and I was not sure how well it was going to go over.

The class was great and I actually enjoyed it.  But lets just say those seats are so not made for sitting!

After the gym we decided we needed to go shopping.  I was excited about this because it was one of the first times in a while I actually had an excuse to look cute.  No more yoga pants and t-shirts.


We went to Panera for lunch before shopping and man was it good! I haven't had much variety in my diet lately so it was nice to have something yummy to put in my belly :)

Chicken Salad and Tomato Soup!
I was able to get a couple things from shopping, but not too much.  I wasn't really wanting to spend too much money on clothes that hopefully wouldn't be fitting in a short while.  But I did get some new tennis shoes and Mamerz got the same ones.  TWINKIES!!!

Saturday night we just hung out on the back porch and watched the puppies swim.  Ordered some pizza and enjoyed a good night in.  I was exhausted from Spin that morning so I was fast asleep by 9:30.  Yeah I know LAME!

Sunday Mamerz and I went to church.  I had missed being able to go to church, and going made me miss my church back in TN.  I cannot wait to get back in the fall!

It rained and rained and rained all day.  And rainy days= movie days!  We watched Big Miracle, and I loved it.  Such a feel good movie from start to finish!


I also got some time to work on some of my canvases.  I had not worked on them in forever and still have a long ways to go.  I got two more painted with their based coats, and lined, taped, and painted with it's white coat!  I cannot wait for all of them to be finished!

I am REALLY loving my color choices!
Hope y'all had an awesome weekend as well:)

Wednesday, June 13, 2012

Chevron Craft Project

A couple of weeks ago I started this SUPES cute Chevron Craft Project.  If you don't know this already, I am in LOVE with Chevron.  Seriously best thing ever.  My blog is chevron, my phone case is chevron, and now I will have a dorm room filled with chevron!

My original inspiration came from this little gem on Pinterest.


Again I love chevron so I immediately fell in love with this.  But I also love pictures.  I have about 6 canvas's from my dorm room that I decorate and put pictures on.  So I got this awesome idea to just chevron the canvas's and then put pictures over top.  

After deciding what I was going to do, I had to come up with a way to paint the chevron onto the canvas.  So where did I turn to find this? Google, duh! And I found this cute blog that showed me how! 

First I painted the canvas the base color I wanted.  Then you measure out lines on your canvas.  My canvas was a little bit of an awkward size to make this perfect, but I did about 1.5 inches.  You do horizontal and vertical lines, so that when you are through you have boxes on your canvas.
I know this is kinda hard to see! Sorry!
You want use pencil for this, and not to make too dark of lines because they will need to be erased later.

Then you go through and draw diagonals through each box using the corners as guidelines.
Again sorry if you can't really see this!
After you have drawn your chevron pattern you grab some masking tape and start the taping process! This part takes a little time.  You tape off every other line so that it makes the chevron design.
Now you can see a little better what is going on here!
When the taping is all done it is time to paint! I learned the hard way that white should be your base coat, because then you don't have to do so many coats to cover the darker color.  Only problem for me was the original colors of my canvas's were dark so I didn't have much of a choice. 

When all is said and done, you peel off the tape and you have your wonderful chevron canvas!
Again not a great picture!
You may have to go back through and sharpen up some of the white lines from the whole bleeding through the tape thing.  Also make sure you erase those pencil lines!

This is the first of six for me and I am in love! My other colors will be grey and gold.  I know it is not perfect, but I am thrilled with what I have been able to do!!

Now go get your craft on and make something you love!!


Sunday, April 15, 2012

My Love of Hair Bows!

As many of you know I am in love with hair bows.  And yes I am almost 21 (11 days!).  I just think they are fun and cute, and the perfect hair accessory.  It all started last year when Lauren made me these for my birthday!
Adorbs right?!

Well from there I bought several more! And I just love them.  This past summer I mostly wore the small bows.  And yes I bought them from the little girls section from Target.  

I know you can barely see it here, but its that cute little pink thing in my hair!


OK so now that y'all know my love for the hair bows, I have a cute little project to share with you! If you have ever tried to go shopping for them, they can be kinda expensive or they are these huge things (I prefer smaller).  This being said making the hair bow can be the best option.  And that is just what I did the other night! Oh and this was an UBER cheap project!!
Ok so I bought these cute little flowers from Michaels.  They were $1.99 for each set of 2.

And then I bought some alligator clips. $2.99

You hot clue the flower to the clip

And get the cutest things ever!

And here is me wearing those cute hair bows to church today! Props to Lauren who showing me how to do my hair like this!

I spent a little over $7 and got 4 new hair bows.  Isn't that just awesome? Yeah I thought so too.  Especially considering thats how much 1 costs at most stores.